
Preparing For Roofing Installation
A new roof provides a fresh layer of protection that will keep your home safe from the elements for decades. It can also boost its curb appeal and resale value.
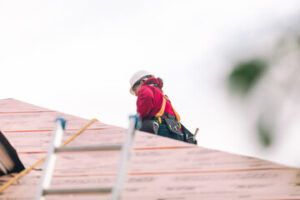
Before the roofing team begins installation, they’ll inspect your flashing and drip edges for rust or other damage. They’ll probably be left in place if they’re in good shape. Contact Roofing Colorado for professional help.
Before the actual roofing work begins, there is a lot of preparation that needs to be done. This is mainly to protect your personal belongings and ensure the project goes smoothly without any problems.
For starters, you will need to prepare your family members and pets. This is because putting on a new roof will be noisy and could possibly disturb your daily routine. The loud noises can also frighten small children and pets. It is best to find alternate accommodations for them while the job is going on. This will also give them a chance to get used to the noises before the project is completed.
Next, you will need to clear your yard of furniture, toys, bikes, or any other movable objects that might be in the way of the roofers as they work. The roofers will be tossing old shingles and other debris into your yard and you don’t want your outdoor belongings getting in the way of these activities. You will also need to trim any branches that hang low on your property. It’s a good idea to do this a day or two before the work starts.
The pounding of the hammers will cause vibrations inside your house, particularly on top floors. This can damage wall hangings like framed pictures or mirrors. You may also need to remove any delicate items that are stored on shelves close to the walls. The vibrations can cause these items to fall off and get damaged.
It’s also a good idea to cover your windows with tarps to prevent dust or other debris from falling inside your home. It’s best to do this a day before the roofing work starts as well.
The roofers will need access to power outlets while they are working. It’s best if they can use exterior outlets, but if you don’t have any, then the garage is the second-best option. It’s important for you to find these outlets before the project starts so that the contractors can plug in their equipment without tripping over cords or creating a hazard.
Materials
There are a variety of different roofing materials that can be used on homes. Each has its own benefits and drawbacks, including how well it can stand up to weather patterns and temperature changes over time. Talking with a roofer is a good way to find out what the best materials are for your area.
The type of roofing materials you choose will also affect the cost. Metal tiles are very durable and can last up to 100 years, but they’re usually more expensive than shingles or other traditional roofing materials. Wood shingles and shakes offer a more classic, rustic look that can add value to your home, but they require maintenance and are susceptible to storm damage.
Asphalt shingles are the most common roofing material because they’re affordable and fairly easy to install. They come in two styles: three-tab and architectural. The latter are thicker than three-tab shingles and have a layered, brick-like texture that can boost your property value. They’re more prone to wind damage than other types of roofing materials, but they can last 15 to 30 years.
A more durable and energy-efficient option is a membrane roof. This can be made from a number of materials, but EPDM and TPO are most common because they’re highly resistant to degradation by chemicals and the sun’s UV radiation. These membranes can be loose laid, mechanically fastened or fully adhered to either nailable or nonnailable decks.
Other roofing materials you can choose from include concrete tiles, which offer a more natural, rustic look that will enhance the overall beauty of your home, or clay tile roofs, which are heavier than shingles and typically last 75 to 100 years. You can also use a solar power system that harnesses the sun’s rays to generate electricity.
You’ll need a sturdy ladder to get on the roof for any work that needs to be done, and it’s important to wear rubber-soled shoes or boots to prevent slippage. You should also use a roof safety harness for extra security. Finally, you’ll need a tool bag that includes a ladder-mounted hammer, roofing nails, tape measure and other tools.
Installation
Once the sheathing is nailed in place, the roofing crew will lay a strip of underlayment over each row of shingles. The underlayment is nailed in a pattern that includes close nails at the edge and more spaced out toward the center of the material. Then the shingle rows are nailed down, starting with the first course and working towards the roof’s ridge. Any roof penetrations such as sewer vents, curved vents for kitchen ranges or bathrooms, or chimneys are sealed with a large bead of roofing cement.
Final Inspection
The final inspection is a critical part of the construction process. It’s a time to make sure that all of the work has been completed according to the plans and codes. However, it can also be a stressful one, especially if you aren’t familiar with your local building authority’s requirements and what is needed to pass the inspection. By learning what to expect from a final inspection and taking steps to prepare for it, you can help ensure that your project meets all of the necessary requirements and can receive the certificate of occupancy that you need.
Many inspectors will provide a checklist ahead of the final inspection, letting contractors know what areas they should focus on preparing for. This gives contractors an opportunity to correct issues that the inspector might identify and ensures that all of the required elements are addressed. This can be a great way to avoid common mistakes like not noting egress, fire safety, and life-safety violations, not fixing problems that have previously been identified, and other errors that are easy for the inspector to overlook.
Preparing for the final inspection can take some time and effort, but it is important that you do so. The best way to do this is to become familiar with your local zoning or building authority’s requirements. You should also ask the inspector for a list of their focus areas for the final inspection and any documentation that they will require you to submit. You can do this when you schedule the penultimate inspection, or by asking for the list from the inspector when you call to schedule the final inspection.
It is recommended that you thoroughly review the project specifications, plans and permits to understand the exact requirements of your specific code enforcement agency for the final inspection. Additionally, it is important to clearly communicate roles and responsibilities for preparing and verifying each checklist item. Lastly, you should plan for the final inspection for when it will be unoccupied to avoid disruptions and reduce the chances of last-minute delays and costly rescheduling fees.